How to install a 12mm tempered glass pool fence?
Steps to follow for a successful glass fence installation.
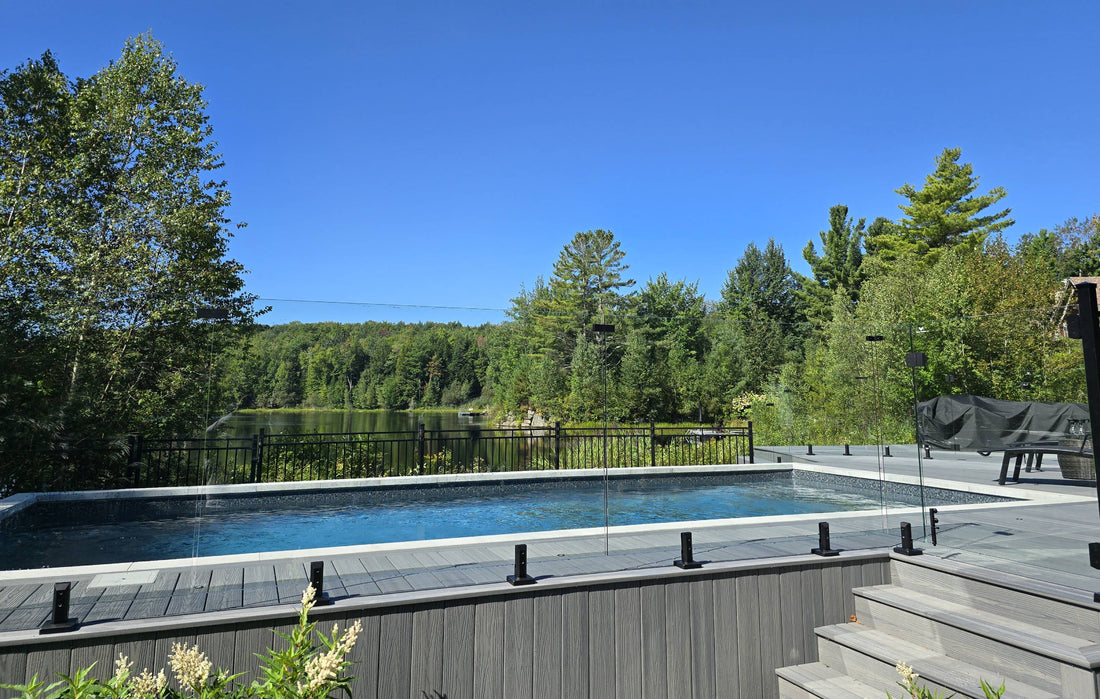
Installing a glass pool fence can seem daunting, but with the right tools, an effective method, and our valuable advice, it's possible to do it yourself or with the help of Habitat Verre. In this article, we'll review the essential steps for properly installing a glass fence and ensuring its strength and compliance with standards.
1. Choose the location
Before beginning installation, it's important to determine the most appropriate location for your installation. If you're unsure where to install it, contact our consultation service.
Points to consider:
- Isolate the pool from the land or the entire land of the house by fencing the patio
- Make sure that all access points are blocked: doors and windows, unfenced cedar hedges, fixed elements within 1 meter that allow climbing, etc.
- To reduce installation costs, choose a route that avoids areas without foundations (lawns and flowerbeds) as much as possible.
- Location of self-closing and self-locking doors
2. Prepare the foundations
Glass panels are subject to strong winds and structural movements, in the long term the panels could become misaligned, fortunately this is easily corrected.
It is important to properly prepare the foundations that will support the panels. It is possible to install them on a concrete slab or curb, with large pavers, and on a wooden, fiberglass, or aluminum structure.
- Concrete : On this structure there is little preparation to be done, in some cases it will be necessary to re-level the slab and repair major cracks.
- Paving : Installation should be done on pavers that are at least 6" x 8" unless they are glued to concrete that will need to be anchored. If the paving stone is too small or in poor condition, a base should be added, for example by placing a concrete block under the paving stone at each location where there will be a spigot. Ideally, pour a concrete border along the entire fence line or replace them with larger pavers.
- Wood : Whether the structure is covered with wood, composite, aluminum, or fiberglass decking, at least three 2x6 joists must be provided to be anchored with 5/16" to 3.5" lag screws. On already built structures, it is possible to reinforce from below. This applies to all types of railings and fences, whether glass or aluminum. Remember to replace damaged elements before installation.
3. Taking measurements
You can measure the different sections yourself. A section corresponds to a space between two corners or a corner and an obstacle (wall, column, post, etc.)
The gross measurement is taken from end to end.
The net measurement takes into account the "glass line" , on concrete or paving stones this is normally 4" from the edge, and on wood it is normally 2¾" from the edge.
To take the net measurement, you must subtract from the gross measurement:
- the glass line (4" or 2"¾)
- 1'' in 90° angles
- 1/2" to 1" before an obstacle
- 2" in angles larger or smaller than 90°
Determine the number of panels
Divide the net measurement by 72" and round up. This value will tell you how many panels you need in a section. (Ex: Net measurement of 240" / 72 = 3.3 --> 4 panels)
Determine the width of the panels in a section
Now we need to remove the spaces between the panels. It's simple; it's equal to the number of panels minus 1. (Ex. 4 panels - 1 = 3" of empty space in this section).
Then subtract 3" from the net measurement of 240" = 237"
Divide this number by the number of panels, in our case 4 (Ex: 237" / 4 = 59"¼)
Since we only have even widths, you'll need to adjust the spacing between panels or with an obstacle. This calculation is done by trial and error.
(Ex: 237-58-60-60-60 = -1) In this case, you need to tighten the spacing so that the whole thing fits into the section. You need to have 240" including the spaces. (Ex: 60+60+60+58=238 --> 240"-238"=2" to be separated into three spaces --> 2/3= 0.66" (+/- 5/8").
You will need to purchase 3 x 60" panels and 1 x 58" panel. When installing, you would leave 5/8 between them.
Installing the spigots
- Mark the glass line on the surface using a chalk line.
- Mark the beginning and end of each panel on the ground, taking care to leave spaces between the panels.
- Identify the center of the spigots, we recommend installing them 10" from the ends of the glass.
- Use a spigot as a template to identify the position of the anchors. Center it on your marking and mark the center of the holes.
- Drill your holes for all spigots (always pre-drill wood or composite boards and ceramic before screwing in the anchors).
- Secure the spigots to the surface with the appropriate anchors.
4. Installation of 12mm glass panels
Always handle them with care, avoiding knocking them together or hitting the corners.
- Place each glass panel into the spigots and align the ends with your marking.
- Start by adjusting the vertical level (tilt) of the panels using the adjustment screws on each spigot base. To do this, all panels must be tightened.
- Loosen all panels.
- Identify the highest panel and start adjusting the horizontal level with it.
- Fix the door(s) to the hinge panels and adjust the closing speed.
Habitat Verre will be there to support you throughout your project and beyond thanks to our after-sales service.
With a little planning and precision, installing a glass pool fence is an easy task . It guarantees safety, elegance, and durability while enhancing your outdoor space.
